Difference between revisions of "3D printers - general information"
(→Training Material: Page title changed) |
(→Upgrade plans: Added workflow.) |
||
| Line 177: | Line 177: | ||
* Review to see if Opensource firmware can be installed, to enable a non proprietary tool chain to be used, i.e. slice using Cura or similar and control with OctoPrint. | * Review to see if Opensource firmware can be installed, to enable a non proprietary tool chain to be used, i.e. slice using Cura or similar and control with OctoPrint. | ||
| + | * Produce a workflow to enable members to follow when using. | ||
Revision as of 12:53, 18 February 2019
We are now allocating 'owners' to the Makerspace equipment, these owners will be responsible for ensuring there are appropriate processes in place for things like maintenance, safety and training etc. The 'owner' for the 3D printers is Keith Ellis, if you are having trouble using the printers, want to report a fault, need some training please speak to Keith or alternatively email your request to ms_3dprinters@icloud.com
Please make sure you know what you are doing if you are using these printers, if you are unsure please ask for assistance. We would much prefer you ask the question rather than adjust something that has already been pre-set and calibrated.
Warning, 3D printers work by heating up and melting plastic filament, the print beds and hot-ends/nozzles get extremely hot. DO NOT TOUCH any hot parts, some of the printers are bare bones and to allow them to work the hot areas are not protected. If you are unsure ask someone to help.
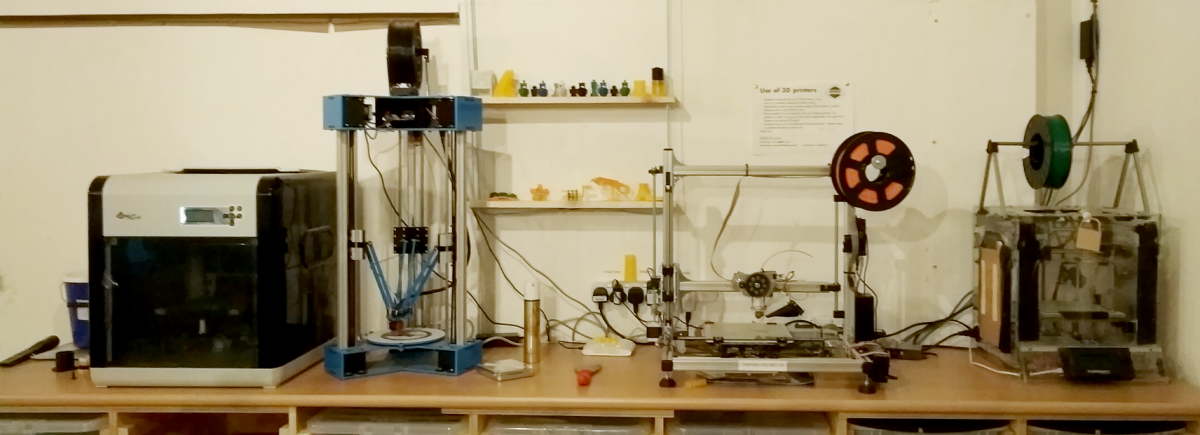
We have four 3D printers
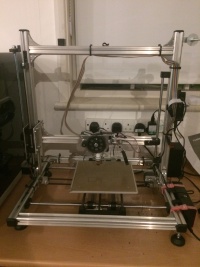
- Velleman K8200
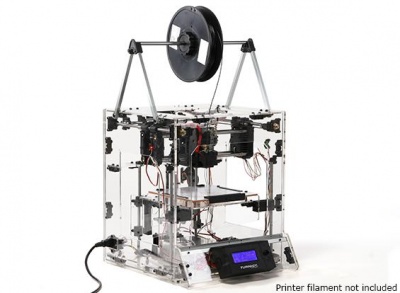
- Turnigy Fabrikator
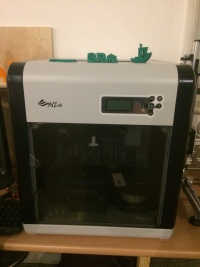
- da Vinci 1.0
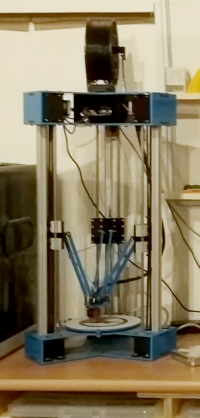
- NFire Delta (talk to Phil if you wish to use this one, it's ... unconventional)
See below for more detailed information on the printers.
Contents
Velleman K8200
This printer is connected to a Raspberry Pi with OctoPi installed. To use, plug the 3d printer and Raspberry Pi into the mains and switch on, after a minute or so the Raspberry Pi will launch the webbased OctoPi control software. Connect your computer to the Makerspace wifi and point your web browser at http://192.168.1.20. You will need an Octopi account to use the printer, please see a committee member to get an account.
You can upload g.code directly and set the g.code to print, or alternatively you can upload an .stl file and use one of the slicer settings already installed within Octo Print.
Specification
| Build volume: | 200mm x 200mm x 200mm |
| Filament diameter: | 3.0mm |
| Nozzle diameter: | 0.5mm |
| PLA only | print at 175 to 180 deg. C |
| Max hotend temperature: | 245 deg. C |
| Max bed temperature: | 80 deg. C |
- Magic numbers for Layer heights, use these for best quality:
- 0.100 mm
- 0.150 mm
- 0.175 mm
- 0.200 mm
- 0.225 mm
- 0.250 mm
- 0.275 mm
- 0.300 mm
- 0.325 mm
After use please make sure the filament has been removed from the extruder and the print bed has been cleaned.
This printer uses 3mm dia. fillament, It prints well with PLA at 180 degrees C and a bed temperature of about 45 degrees C. The nozzle is 0.5mm diameter and the best prints produced to date have used a layer height of 0.3mm
The Firmware has recently (20/12/2018) been updated to Marlin 1.1.8 with thermal runaway protection enabled. Certain constraints have been limited in firmware
- Maximum hot end temperature is 245 deg.C
- Maximum bed temperature is 80 deg.C
- Thermal runaway is now enabled
The reason for the hot end limit is because it is made of PTFE and it degrades above 250 deg.C. This has recently been replaced and to save replacing it again protection has been enabled in firmware. In addition the hot end appears to be hotter than actually recorded, try printing at 180 deg.C on only go hotter if you need to.
Current Issues
- The hot end temperature is not accurate, print PLA at 175 - 180 deg. C. Do not do any higher
- Only operate the part cooling fan at 50%, any higher and the hot end temperate cannot be maintained.
Upgrade Plans
- Install new E3D hotend and direct drive Titan extruder for 1.75mm filament
- - Parts arrived, partially installed, hopefully working by 20th February.
- Install new power supply
- Install RAMPS control board
- Look at Z nut, currently has a lot of backlash
- Install new belts and tighten properly
- Consider installing second Z lead screw and motor
- Consider upgrading heated bed
Turnigy Fabrikator
WARNING This printer has exposed 230v inside the case below the print bed. DO NOT put your hands into this printer below the print bed. We are in the process of making covers to ensure accidentally coming into contact with 240v is not possible.
Originally sold by Hobby King, there is plenty of info on it on YouTube, but it seems it is not supported by Hobby King any more. However it is just an Arduino controlled RAMPS board. YouTube channel here
Specification
| Overall size | 360 x 400 x 600 mm |
| Build volume: | 150mm x 150mm x 100mm |
| Filament diameter: | 1.75mm |
| Nozzle diameter: | 0.4mm |
| Filament types | PLA, ABS |
| Max hotend temperature: | 275 deg. C |
| Max bed temperature: | 110 deg. C (tbc) |
| Print speed | 400mm/sec (too fast) |
- Print Platform: phenolic heat stabilized bed with a removable glass print area
- Other Features: ball bearing liner rods, SD card, cable free printing, top feed anti-bind spool feed, twin print cooling fans
Current Issues
- Hotend does not have cooling fan, currently gets lots of blockages, probably combination of heat creep and bad hot end design.
Upgrade plans
- Install E3D hotend, try and use existing extruder, if not convert to bowden drive and install new extruder.
- - We have parts, mounts currently being designed, will look at after K8200 hot end upgrade is complete
- Design/make covers for areas of exposed live 240v contacts.
- Install Marlin 1.1.9 with thermal runaway enabled
- Give it a good clean
NFire Delta
A Delta printer currently on load from Phil Willis. We are in the process of getting this printer fully tuned and making suitable slicer profiles available.
Note If you are using this printer and generate the gcode yourself, please ensure you DO NOT have M84 in the end gcode. M84 disables the stepper motors, if the stepper motors are disabled at the end of the print, the print head will dive into the print or print bed, potentially destroying the print, or worse, damaging the printer. After the print is complete and the print head is below 40deg.C, the print head should be parked on the bed and only then M84 called. The Octoprint instance has a macro button to park the head safely. Please use.
Specification
| Build Volume | 150mm dia. by 150mm tall |
| Hotend | E3D V6 lite |
| Filament diameter | 1.75mm |
| Nozzle diameter | 0.4mm |
| Max hot end temperature | 245 deg. C |
| Build surface | Non heated, taped acryclic |
| Resolution | 0.3 – 0.05 mm |
Upgrade plans
- Install Marlin 1.1.9 with thermal runaway enabled
- Ensure extruder is calibrated
- Ensure OctoPi has shortcut for cooling down print head and parking print head on bed.
da Vinci
Allegedly working again. Settings and filament currently unknown, investigation welcomed.
This is a proprietary printer, to use at present I believe you need to use the software available from the website.
Specification
from the website xyzprinting.com web site
- Build area: 200mm x 200mm x 200mm
- Max travel speed: 120mm/s
- 1.75mm dia. filament
- 0.4mm diameter nozzle
- Max nozzle temperature: 240 deg. C
- Print bed temperature: 40 - 90 Deg. C
- Material compatibility: PLA / ABS / Flexible / Tough PLA
- Supported file formats: .stl, XYZ Format (.3w), 3mf, G-code
Upgrade plans
- Review to see if Opensource firmware can be installed, to enable a non proprietary tool chain to be used, i.e. slice using Cura or similar and control with OctoPrint.
- Produce a workflow to enable members to follow when using.
General usage information
Filament is expensive, so some best practices are suggested to minimise the opportunity for mishaps. Foremost, if you are printing multiple copies of an item, it's best to simply do one first to ensure it will print as you expect. Not much is worse than four almost perfect models, but all with the same unexpected defect or sizing error.
For printing a large object, you're probably best off using the Velleman, the filament is thicker and it simply puts plastic down faster. As a consequence though, it's not quite as precise as Turnigy.
When printing multiple items, remember that if one of them goes wrong, due to say bed adhesion issues, an extruder bump, filament feeding mishap, Jimbo eating it, or other unexpected occurrence, that you will waste a lot of filament either by having to abort the job and losing the correct object(s), or having a huge pile of string building up where the printer believes it should be printing the missing object. So sometimes it's worth not batching, especially so for tall or delicate items.
Charges
We do not charge for the use of the printers, but we do ask that you pay 5p for each gram of filament used. Scales are provided for weighing used material/prints. Thank you very much.
Training Material
This is work in progress, but here we keep the latest training material for the 3D printers
Octoprint
Octoprint is software that is specifically designed to control 3D printers. We currently have a Raspberry Pi hooked up the K8200 and Turnigy 3D printers which run Octoprint.
Access
Web based interface, currently accessible whilst connected to the Ipswich Makerspace network via
- http://192.168.1.20/ for the K8200
- http://192.168.1.21/ for the Turnigy
To login use the following details
- Username: IpswichMakerspace
- Password: raspberry
Features
- Web based interface, available from any web browser when connected to the Ipswich Makerspace network
- Manual control of X, Y and Z motors as well as bed and hot end heaters and extrusion motor, this is useful for pre-heating the bed and priming the print nozzle.
- Ability to upload gcode files and print
- gcode visualiser to allow review the print layer by layer prior to printing
- Ability to upload 3D stl files and produce gcode with the built in Cura slicer profiles
- Basic stl viewer
Using the in-built Cura profiles
Octoprint has a plugin architecture, one plugin installed is the Cura plugin. This allows Cura .ini files (which detail how the slicing is to carried out) to be uploaded and applied to .stl files allowing slicing to be carried out locally on the Pi from an stl file without needing to do the slicing separately.
The Cura profiles have been named in such a way that they describe the slicer settings.
The file name is made up in several pieces as shown below.
Printer name | Filament material | Hotend temperature | Infill percentage | Support settings | Platform settings
An example file name is:
K8200_PLA_190_I30_S0_P0
This translates as follows;
- K8200 - The printer name
- PLA - The fillament type
- 190 - Hotend temperature of 190 degrees C
- I30 - Infill at 30 %
- S0 - No supports
- P0 - No platform
the full range of options for supports are:
- S0 - No supports
- S1 - Support where touching Build plate
- S2 - Support everywhere
the full range of platform options are:
- P0 - No platform
- P1 - Print with brim
- P2 - Print with raft
Creating your own profiles
Firstly, it may not be necessary to create your own profile, if you have some requirements that are not catered for by the profiles already provided, then you can slice your own 3D files using your own slicer of choice and then uploading the gcode produced directly into Octoprint. this eliminates the need to slice within Octoprint.
However, if you think the slicing profiles could be supplemented then feel free to create your own, but please use the file name convention shown above.
Unfortunately the Octoprint Cura plugin is a bit picky about which Cura .ini files it accepts. If you want to create a Cura profile you must download Cura version 15.04 or earlier. the newer version will not work. Cura can be downloaded here, please note version 3.x.x is actually newer than 15.x.x, the newer 3.x.x will not work.
We have a Github repo for keeping our profiles, click here. Feel free to create a pull request to add profiles.
Booking time on the 3D printers
- Members have priority use of 3D printers, if you are not a member please ask before using
- Membership allows you to book usage of the printers in advance
3D printer booking procedure
Check the calendar for the printer you want to book to see if it is available
| Velleman K8200 | - | http://bit.ly/K8200_cal |
| Turnigy Fabrikator | - | http://bit.ly/Turnigy_cal |
If the time you are interested in is free, please make a request on the form here: http://bit.ly/Book_3D_printer
