Difference between revisions of "3D printers - general information"
(→Access) |
(→Our Printers: Ender 3 added) |
||
| Line 14: | Line 14: | ||
# [[3D printer - Creality CR10 | Creality CR10]] | # [[3D printer - Creality CR10 | Creality CR10]] | ||
# [[3D printer - Monoprice Mini Delta | Monoprice Mini Delta]] | # [[3D printer - Monoprice Mini Delta | Monoprice Mini Delta]] | ||
| − | # [[3D printer - Velleman K8200 | Velleman K8200]] | + | # [[3D printer - Creality Ender 3 | Creality Ender 3]] |
| + | # [[3D printer - Velleman K8200 | Velleman K8200]] - currently not in service | ||
# [[3D printer - Turnigy Fabrikator|Turnigy Fabrikator]] - currently not in service | # [[3D printer - Turnigy Fabrikator|Turnigy Fabrikator]] - currently not in service | ||
# [[3D printer - da Vinci|da Vinci 1.0]] - currently not in service | # [[3D printer - da Vinci|da Vinci 1.0]] - currently not in service | ||
Revision as of 20:34, 13 October 2019
We are now allocating 'owners' to the Makerspace equipment, these owners will be responsible for ensuring there are appropriate processes in place for things like maintenance, safety and training etc. The 'owner' for the 3D printers is Keith Ellis, if you are having trouble using the printers, want to report a fault, need some training please speak to Keith or alternatively email your request to ms_3dprinters@icloud.com
Contents
Warning!
Please make sure you know what you are doing if you are using these printers, if you are unsure please ask for assistance. We would much prefer you ask the question rather than adjust something that has already been pre-set and calibrated.
Warning, 3D printers work by heating up and melting plastic filament, the print beds and hot-ends/nozzles get extremely hot. DO NOT TOUCH any hot parts, some of the printers are bare bones and to allow them to work the hot areas are not protected. If you are unsure ask someone to help.
Our Printers
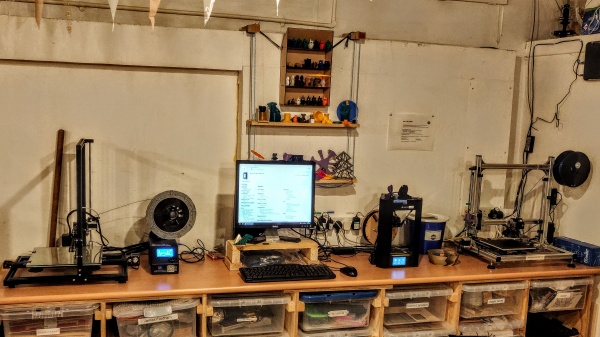
We have several 3D printers available for use, for specific information on each one see the links below:
- Creality CR10
- Monoprice Mini Delta
- Creality Ender 3
- Velleman K8200 - currently not in service
- Turnigy Fabrikator - currently not in service
- da Vinci 1.0 - currently not in service
- NFire Delta - currently not in service
General usage information
Filament is expensive, so some best practices are suggested to minimise the opportunity for mishaps. Foremost, if you are printing multiple copies of an item, it's best to simply do one first to ensure it will print as you expect. Not much is worse than four almost perfect models, but all with the same unexpected defect or sizing error.
When printing multiple items, remember that if one of them goes wrong, due to say bed adhesion issues, an extruder bump, filament feeding mishap, or other unexpected occurrence, that you will waste a lot of filament either by having to abort the job and losing the correct object(s), or having a huge pile of string building up where the printer believes it should be printing the missing object. So sometimes it's worth not batching, especially so for tall or delicate items.
Charges
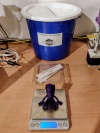
We do not charge for the use of the printers, but we do ask that you pay 5p for each gram of filament used. Scales are provided for weighing used material/prints. Thank you very much.
Training Material
This is work in progress, but here we keep the latest training material for the 3D printers
Octoprint
Octoprint is software that is specifically designed to control 3D printers. We currently have a Raspberry Pi hooked up to the K8200, Monoprice Mini Delta and CR-10 3D printers which run Octoprint.
Access
Web based interface, currently accessible whilst connected to the Ipswich Makerspace network via
- http://192.168.1.20 for the K8200
- http://192.168.1.27 for the CR-10
- http://192.168.1.26 for the Mini Delta
To login use the following details
- Username: IpswichMakerspace
- Password: raspberry
Features
- Web based interface, available from any web browser when connected to the Ipswich Makerspace network
- Manual control of X, Y and Z motors as well as bed and hot end heaters and extrusion motor, this is useful for pre-heating the bed and priming the print nozzle.
- Ability to upload gcode files and print
- gcode visualiser to allow review the print layer by layer prior to printing
- Basic stl viewer
Using Octoprint to print your models
Slicing with Cura
Before you can print on any of the 3D printers you must first Slice your 3D model.
Next to the 3D printers is a PC specifically for this task, it currently has 2 version of Cura installed version 3.6 and the new 4.1 version which has been modified for Creality printers for the time being please use version 3.6.
To slice your model you must have the .stl file on a USB stick to load it onto the PC, please create yourself a folder for storing your files.
Once you have the files on the PC, simple open Cura and once open click the folder icon to locate and load your .stl file.
Next you need to select the printer you want to print on, next to the folder icon will be a printer name click this to select the printer you want.
Now comes the fun part, selecting the setting you want to print with. There are a number of preset profiles available so if you are less experienced please select one of these or if you require some help with this part speak to Keith, Matt, Aron, Adam or James.
Now just hit Slice in the bottom right corner, this will then set Cura doing it's thing and slice your model. You should now select Preview and the top middle of the screen to allow you to check for any errors in the sliced model.
If everything looks ok and your happy to print you can save this sliced model as a .gcode file ready to send to the printer of your choice. Simply click the save to file button on the bottom right, and save it to your folder.
Printing with Octoprint
First you must power up the printer your going to use as well as the Raspberry Pi connected to it.
Now that you have a .gcode file you can connect to the printer your going using via Google chrome, to access the printer double click the printers icon on the desktop this will open a browser window to the Octoprint web interface.
On the left hand side of this screen you will see a file list on the Pi, as you did on the PC please create your own folder to store your .gcode files. Once you have done this scroll down click the upload button and select your freshly created .gcode file. This will now upload to Octoprint.
Before clicking any more buttons, please visually check your chosen printer has a clean bed and is ready to print.
I recommend pre-heating the bed and hot end of the printer as this saves time after clicking print. So on the temperature tab on Octoprint, click the box next to the hot end and input 180°C and hit enter, do the same for the bed and input 60°C. the printer will now heat up, so DO NOT TOUCH THE NOZZLE. Allow this to reach temperature before moving on.
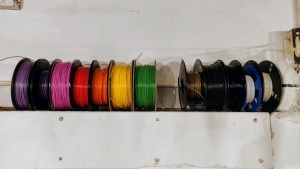
Now you can load the filament into the printer you are using, select it from those available and sit the spool on the spool holder of the printer. Take the loose end of the filament from the spool and insert it into the extruder, you will need to squeeze the extruder arm to allow the filament to pass through and continue to the hot end. Push the filament until is comes out of the nozzle.
Once this is done you are ready to actually print, so click the file you uploaded and ensure this is shown on the top right of the Octoprint screen, if it is click print and watch with wounder as plastic forms your model in 3D.
Booking time on the 3D printers
- Members have priority use of 3D printers, if you are not a member please ask before using
- Membership allows you to book usage of the printers in advance
3D printer booking procedure
Check the calendar to see if it is available
| 3D printers | - | http://bit.ly/3Dprinter_cal |
If the time you are interested in is free, please make a request on the form here: http://bit.ly/Book_3D_printer


